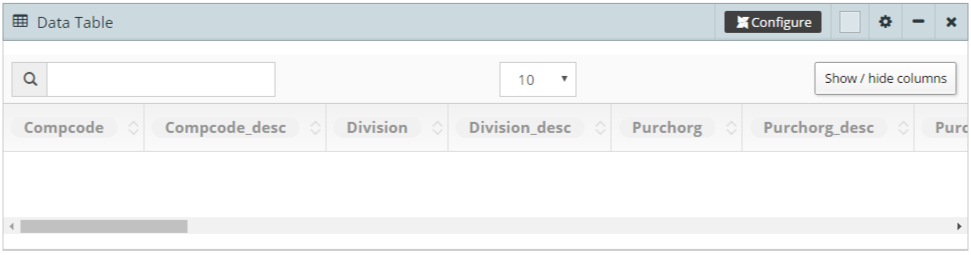
How to create a table
By clicking on Add Table button, you can have the table.
Now, click on Edit Title button
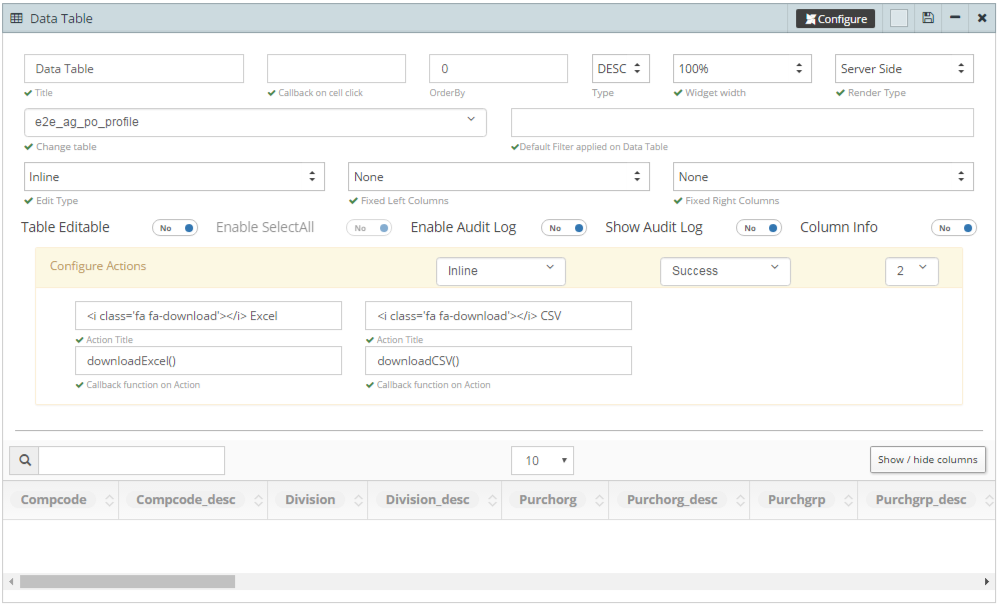
Here you can edit the table:
Title: Edit the table name
Callback on cell click: Popup will display on click of particular cell.
OrderBy: you can arrange the table data by setting its index value, and index starts with 0.
Type: DESC and ASC. You can arrange data on ascending or descending basis.
Widget width: you can edit table width to 25%, 50%, 75% or 100%.
Render Type: 2 types of render type:
- Server Side: We request to the server for data.
- Client Side: All of the data is fetched in one go.
Change table: Bydefault it will show selected table, but you can select any other table from drop down.
Default Filter applied on Data Table: Whatever default filter you want to apply in your table you can put here.
Edit Type: There are 2 types available to edit the table data:
- Inline: You can edit by clicking on a particular cell.
- Form: In From Edit Type, it will open a popup to edit the table.
Fixed Left Columns: If your table is wide enogh that you have to scroll it to access the table and you want some particular colunm to visible while scrolling. fix any number of left colunm of the table to the screen.
Fixed Right Columns: fix any number of right colunm of the table to the screen.
Table Editable: By setting yes/no you can make your table editable. You can find editable table in PostgreSQL.
Enable Audit Log: It will record all the activity log of the table as what is updated, who changed it and at what time.
Show Audit Log: If you will enable this button then it will show the audit log.
Column Info: If you will click on info icon then it will show all the information about colunm throgh charts.
Configure Actions: In this section we can define buttons as we wanted in our table, bydefault we will have excel and CSV buttons. The button could be visible inline and dropdown, and could be of any type - Default, primary, success etc, and we can have any number of buttons.
Action title, we can write button name Callback function on Action, we can write function to perform some action.
Configure: Click on configure button of the Data Table, one popup will open:

- Column Settings: We have two sections Available Columns and Selected Columns. By default all the columns would be under Selected Columns, from there we can move columns to Available Columns using Add & Remove buttons and we can keep selected columns to show in the table. Click on any Selected column you will get few option to perform on that column:
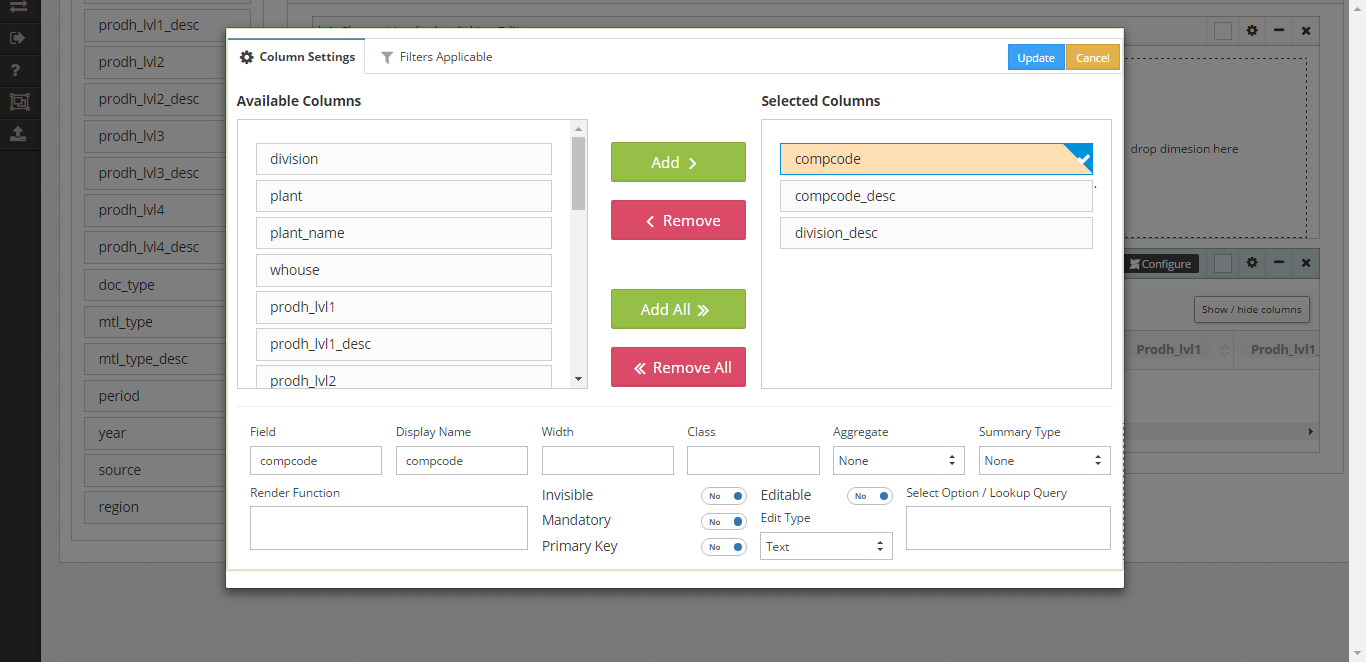
- Field: Column Name which you have selected
- Display Name: You can edit any field name by updating display name
- Width: We can specify the width of a perticular column
- Class: You can add javascript here for the field.
- Aggregate: To get the aggregate of a perticular column we can select any one from the drop down: None, SUM, COUNT, Distinct, AVG.
- Summary Type: If you want some summary on the column you can select one from the drop down: None, SUM, COUNT, Distinct, AVG
- Render Function: Render function is used to add some prefix and suffix to some field. like we have a salary field and we want to add $ to it we can use $ + data
- Invisible: If you will click yes for this then the column will not be visible in the table but the column will be searchable.
- Mandatory: You can make any field in the table as mandatory.
- Primary Key: You can set any column as a primary key for the table.
- Editable: You can make any field editable in the table.
- Edit Type: If you will make any field as editable then you can specify its edit type as Text, Text Area, Select, Checkbox, Date, Lookup and Number.
- Select Option / Lookup Query: You can specify your select query here like select username,’’ from users where lower(username) like ‘%<Q>%’.